
Last updated July 26, 2026
Roof Replacement & Installation Troubleshooting: Common Problems and How to Fix Them
Here’s a number that stops most homeowners cold: roughly 70 percent of premature roof failures in the United States trace back to installation errors, not defective shingles. In Los Angeles, where a single winter storm can drop two inches of rain in an afternoon and summer attic temperatures routinely hit 140 degrees, a properly installed roof isn’t a luxury. It’s the difference between a dry home and a $40,000 mold remediation. The best time to catch a faulty roof installation isn’t after the first rain. It’s the afternoon the crew finishes, before the scaffolding comes down and the site is cleaned up. This guide shows you exactly what to look for, what questions to ask, and how to document problems while you still have leverage. For more guides & resources, see our blog.
Quick Answer
Most roof installation problems stem from improper nailing, inadequate flashing, or poor ventilation - all visible to a careful observer before the crew leaves. A proper post-installation inspection checks nail placement, shingle alignment, drip edge continuity, vent balance, and flashing integration at every penetration. Document anything irregular with dated photos and written notes; this becomes your standing if a warranty claim or callback becomes necessary.
Table of Contents
- How to Spot Improper Nailing Patterns
- Reading Shingle Courses: Alignment and Exposure
- Flashing Integration: Where Most Leaks Begin
- Drip Edge Installation and Warranty Compliance
- Ventilation Installation: The Hidden Failure Point
- The 90-Day Observation Period: Normal vs. Defect
- Navigating Warranty Claims and Callback Disputes
- Your Post-Installation Walkthrough Checklist
How to Spot Improper Nailing Patterns
The nail is the smallest component of a roof and the most common point of failure. Every asphalt shingle carries a manufacturer’s nailing zone, typically a reinforced strip marked with guidelines. Nails placed above this zone - high nailing - leave the shingle’s seal strip unsupported. Nails placed below it - low nailing - expose the fastener to water migration. Both void the warranty and both are epidemic on rushed jobs.
From ground level in Los Angeles neighborhoods like Encino or Pasadena, where many homes have visible roof planes from the street, you can spot trouble without climbing. Look for these indicators:
- Lifted shingle tabs: A nail missing the adhesive strip allows wind to work the tab loose. In the Santa Ana wind corridors of the San Fernando Valley, this shows within the first season.
- Nail heads visible on the shingle surface: Proper nailing hides the fastener beneath the overlapping course. Surface-visible nails mean placement was too high or the gun angle was wrong.
- Consistent horizontal lines of exposed nails: This suggests a crew set the nail gun depth incorrectly and ran entire rows before noticing.
- Clustered nails in one area, sparse in another: Hand-nailing fatigue or gun malfunction. Either way, the fastening pattern doesn’t meet manufacturer specs.
Manufacturer requirements vary. Atlas shingles specify four nails per shingle in standard applications, six in high-wind zones. IKO’s Cambridge line requires placement within a defined target area. Tamko’s Heritage series has similar constraints. A contractor who cannot produce the manufacturer installation guide for the specific product on your roof is a contractor who hasn’t read it.
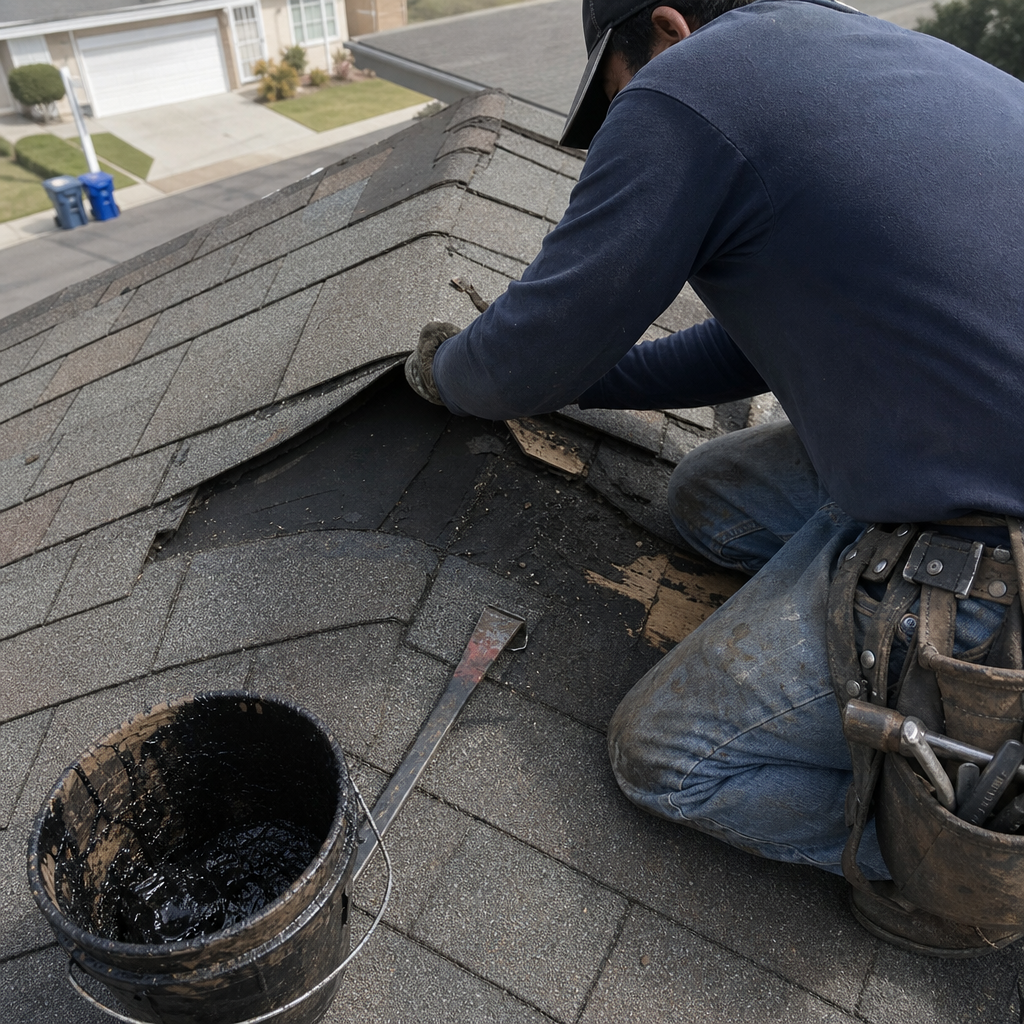
The fix for improper nailing is removal and replacement of affected shingles. Partial repair rarely works because adjacent shingles have been perforated by the original misplaced nails. In our experience across Los Angeles County, crews who nail poorly also tend to rush flashing and ventilation. One error predicts others.
Reading Shingle Courses: Alignment and Exposure
Shingle courses should run straight and true, with consistent exposure - the visible portion of each shingle - from eave to ridge. A wavering line or staggered edge isn’t cosmetic. It indicates the starter course was misaligned, the layout chalk lines were skipped, or the crew worked without a reference system. Each of these errors compounds as courses stack upward.
Proper exposure matters because it determines how much overlapping material protects the nail line and seal strip. Standard three-tab shingles call for 5 to 5.5 inches of exposure. Architectural shingles vary by product, typically 5.5 to 7.5 inches. Too much exposure leaves nails under-protected. Too little wastes material and creates a lumpy, irregular surface that traps debris.
From the ground or a neighbor’s balcony, check these alignment markers:
- The horizontal baseline: Stand at the street and sight along the eave. The bottom edge of the first full course should describe a straight line. A sagging or rising edge means the starter strip was poorly aligned.
- Vertical alignment at valleys and hips: Shingles should cut cleanly into valleys, not wander across the centerline. A valley that looks jagged or meandering signals layout errors that will channel water incorrectly.
- Consistent shadow lines: Architectural shingles create dimensional shadow patterns. These should run in parallel lines. Random, irregular shadowing means courses wander in and out of alignment.
- Ridge cap symmetry: The cap shingles at the peak should overhang equally on both slopes. Uneven overhang means the ridge line itself is crooked or the caps were applied without measurement.
In Los Angeles, where many homes in neighborhoods like Silver Lake and Echo Park have complex roof geometries with multiple valleys and dormers, alignment errors are especially common. Crews unfamiliar with cut valleys versus woven valleys, or unsure how to handle dead valleys where two roof planes meet flat, produce work that looks acceptable from the driveway and fails within five years.
The correction for misaligned courses depends on severity. A single wandering course can sometimes be repaired by removing and relaying shingles above it. Multiple errant courses, or exposure errors affecting the entire slope, require stripping back to the error’s origin. This is why the post-installation inspection matters. Catching it early means the crew fixes it before you sign the completion certificate.
Flashing Integration: Where Most Leaks Begin
Flashing is the sheet metal or membrane that bridges roof penetrations and transitions - chimneys, vents, walls, valleys, and eaves. It is also the most commonly botched element of roof installation. A shingle can be slightly misaligned and still shed water. Flashing with a gap, a reversed lap, or missing sealant invites water directly into the structure.
Los Angeles presents specific flashing challenges. The combination of intense UV exposure, thermal cycling between 50-degree winter nights and 110-degree summer attic peaks, and occasional heavy rain events tests every joint and seam. Flashing that works in Portland or Minneapolis may fail here within a decade if not properly detailed.
These are the critical flashing inspections to make before the crew departs:
- Step flashing at walls: Each piece should overlap the one below like shingles on a wall. The top edge should be embedded in wall mortar or sealed with compatible sealant. A single reversed piece creates a funnel into the wall cavity.
- Chimney cricket or saddle: Chimneys wider than 30 inches require a peaked diverter behind them. Without it, water pools and accelerates deterioration. Many Los Angeles homes from the 1940s and 1950s have chimneys in this range, and crickets are often omitted on replacement jobs where the original roof lacked one.
- Pipe boot seal: Rubber boots around plumbing vents crack and fail. New installations should use boots rated for the pipe diameter, with the rubber collar seated firmly against the pipe surface. A gap here is an automatic leak within two to four years.
- Valley flashing exposure: In open valleys, the metal center should be visible and unobstructed by shingle tabs. In closed valleys, the cut should be clean and the shingles should overlay the valley metal with adequate overlap. A “California valley” - shingles laid across without cutting - is fast and wrong.
We document every flashing detail with photos from your actual roof, not stock images or generic inspection reports. If there’s a question later, you have timestamped evidence of what was installed and how.
Drip Edge Installation and Warranty Compliance
The drip edge is a simple L-shaped metal strip at the roof perimeter. It directs water away from fascia boards, protects the roof edge from wind-driven rain, and provides a clean termination for shingles. Its absence or improper installation voids most manufacturer warranties, including those from GAF, CertainTeed, and Owens Corning. Yet we still find it omitted on budget Roof Replacement & Installation services across Los Angeles, particularly in areas where homeowners are pressured into quick decisions after storm damage.
Proper drip edge installation has three characteristics visible from ground level:
- Continuity: The strip runs unbroken along every eave and rake. Seams at corners should be lapped minimum two inches, with the upper piece overlapping the lower to shed water outward.
- Placement: At eaves, the drip edge sits beneath the underlayment. At rakes, it sits on top. This sequence - eave under, rake over - prevents water from running behind the edge at corners.
- Extension: The lower leg should project approximately half inch beyond the fascia. Too short, and water clings to the fascia. Too long, and it looks amateur and creates a hazard.
Some contractors substitute a bent shingle tab or a bead of caulk for proper drip edge. Neither meets manufacturer specifications. Neither protects the fascia. Neither satisfies warranty requirements. When we encounter this on inspection calls in neighborhoods like Torrance or Alhambra, the homeowner often has no recourse because the original contractor has disappeared or disputes that drip edge was included in the scope.
Our written estimates specify drip edge by type and gauge. Our completion photos show it installed. This is part of the square deal: the price we quote is the price you pay, and the materials we specify are the materials on your roof.
Ventilation Installation: The Hidden Failure Point
Poor ventilation destroys roofs from the inside out. In Los Angeles, where attic temperatures can exceed 140 degrees for months, unventilated or improperly ventilated attics bake shingles from below, accelerating thermal aging and causing premature curling, cracking, and granule loss. The damage looks like sun exposure or defective product. It is neither. It is a ventilation design failure that should have been caught at installation.
A balanced ventilation system pairs intake at the eaves or soffits with exhaust at or near the ridge. The ratio is critical: the 2022 California Building Code requires one square foot of net free ventilating area for every 150 square feet of attic floor space, or 1:300 if certain conditions are met. Many replacement roofs maintain original ventilation that was inadequate even for 1960s construction, let alone modern insulation levels.
Here’s what to verify before the crew leaves:
- Intake vents are unblocked: New insulation, baffles installed incorrectly, or simply debris can clog soffit vents. Shine a flashlight into the soffit from outside; you should see daylight or feel airflow.
- Ridge vent is continuous and properly cut: The slot in the roof deck should run the full ventilated length, typically 1.5 to 2 inches on each side of the ridge board. Gaps or narrow sections create dead zones where heat accumulates.
- Exhaust and intake are balanced: Exhaust without intake pulls conditioned air from the house through ceiling penetrations. Intake without exhaust is nearly useless. The system must work as a pair.
- Multiple exhaust types don’t conflict: A powered vent paired with ridge vent can short-circuit the system, pulling intake air directly to the fan and bypassing the attic’s extremities. One type of exhaust, properly sized, is preferable.
In hillside Los Angeles neighborhoods like Laurel Canyon or the Hollywood Hills, where attics are often irregular and cramped, ventilation design requires judgment and experience. A crew that treats every roof as a standard ranch gable will miss the nuances that determine whether your attic breathes or suffocates.
We calculate ventilation requirements for every replacement roof we quote. We specify the products by manufacturer and model. Boral’s high-profile ridge vents, for example, offer specific net free area ratings that we match to your attic volume. This is not a detail to trust to chance.
The 90-Day Observation Period: Normal vs. Defect
A new roof changes behavior in its first months. Some changes are normal settling. Others signal defects that will worsen if not addressed. The distinction matters because warranty coverage and contractor obligations differ. Documenting the wrong thing wastes your time. Missing the right thing costs you money.
Normal behaviors in the first 90 days include:
- Minor granule loss in gutters: New shingles shed excess granules from manufacturing. This tapers off within the first few rains.
- Slight sealant bleed at tab edges: Warm weather activates the asphalt sealant. Small beads at shingle edges are common and harmless.
- Subtle color variation: Shingles from different production lots may vary slightly. This usually blends within a season of sun exposure.
Behaviors that require immediate documentation and contractor notification:
- Cupping or curling of shingle edges: This indicates inadequate fastening, poor ventilation, or product defect. It will not improve and will accelerate.
- Tabs that lift and do not reseal: After warm weather, sealant should bond shingle tabs to the course below. Persistent lifting means the sealant didn’t activate or the nail placement prevents proper seating.
- Water stains on interior ceilings or walls: Any interior moisture after a new roof installation is unacceptable and indicates flashing failure, underlayment breach, or penetration seal error.
- Sagging or waviness in roof plane: This may indicate deck deterioration that wasn’t addressed, or improper loading of materials during installation that stressed the structure.
Los Angeles weather patterns complicate this assessment. The dry summer months may not test waterproofing. The first winter storm reveals what the summer concealed. We advise homeowners to inspect attic spaces after the first significant rain, or to schedule our $89 Seasonal Tune-Up for a professional assessment before the rainy season begins.
Our 90-Day Done Right Promise covers this period explicitly. If something is not right, we come back and make it right. No paperwork, no arguing, no runaround. We stand behind it.
Navigating Warranty Claims and Callback Disputes
When a new roof fails, homeowners face two potential warranty paths: the manufacturer’s product warranty and the contractor’s workmanship guarantee. These cover different things, require different documentation, and fail for different reasons. Understanding the distinction before you need it saves weeks of frustration.
Manufacturer warranties - from GAF, CertainTeed, Owens Corning, or others - cover defects in the roofing material itself. They do not cover installation errors. A shingle that fails due to factory defect is covered. A shingle that fails because it was nailed incorrectly is not. Manufacturer warranties also require that installation follow their published specifications exactly. Drip edge omission, improper nailing, or incompatible ventilation products can all void coverage.
Contractor workmanship guarantees cover installation errors. Their value depends entirely on the contractor’s continued existence and willingness to respond. This is why the storm-chaser model fails: the company that installed your roof in March is dissolved and operating under a new name by November.
To maximize your standing in any dispute, document these elements during and immediately after installation:
- Product delivery receipts: Confirm the manufacturer, product line, color, and lot numbers match your contract. Substitution without notice is a red flag.
- Installation photographs: Date-stamped images of nailing patterns, flashing details, ventilation components, and drip edge placement. Most smartphones embed this data automatically.
- Written completion certificate: Not just an invoice, but a document stating work was completed per manufacturer specifications and applicable code. Request this specifically.
- Manufacturer warranty registration: Many enhanced warranties require homeowner registration within a limited window. Do not assume the contractor handled this.
- Correspondence records: Save all texts, emails, and notes from phone calls. Verbal promises evaporate; written records persist.
If a contractor disputes your claim, the California Contractors State License Board accepts complaints and can facilitate resolution. Small claims court is available for disputes under $12,500. Your documentation determines whether these avenues succeed.
We provide every client with a completion packet: product specifications, installation photos, warranty registration assistance, and our written 90-Day Done Right Promise. We have served Los Angeles since 2016, and we plan to be here in thirty years. Our phones are staffed by a live person 24 hours a day, including the middle of a storm. We will be there when we say.
Your Post-Installation Walkthrough Checklist
Use this checklist the day work concludes, before you sign completion documents or release final payment. Each item can be assessed from ground level, a ladder at the eave, or a second-story window. Do not climb the roof yourself.
- Nail pattern check: From the ground with binoculars, verify no nail heads are visible on shingle surfaces. Spot-check accessible eave edges for placement within the manufacturer’s nailing zone.
- Course alignment: Sight along eave lines and ridge lines for straight, consistent courses. Check that shadow lines on architectural shingles run parallel.
- Flashing inspection: Verify step flashing is visible and properly lapped at wall intersections. Confirm pipe boots are seated tightly. Check that chimney crickets are present where required.
- Drip edge verification: Confirm metal edge is present at all eaves and rakes, properly lapped at corners, with correct projection beyond fascia.
- Ventilation assessment: Check soffit vents for blockage. Verify ridge vent is continuous and properly capped. Note any powered vents and confirm they are not paired with ridge vent in conflicting configuration.
- Cleanup and debris: Magnetic nail sweep should have been performed. Gutters should be clear. Grounds should be free of shingle wrappers, underlayment scraps, and discarded flashing.
- Documentation received: You should have the final invoice, completion certificate, product specifications, warranty information, and contractor contact for callbacks.
Take dated photographs of anything that concerns you. Email them to the contractor with your questions before signing completion. A contractor who rushes you past this step is a contractor with something to hide.
Common Mistakes to Avoid
- Accepting verbal assurances instead of written documentation. Every promise about materials, coverage, or warranty should appear in your contract or completion packet. Verbal commitments are unenforceable.
- Paying in full before inspection. California law limits down payments to $1,000 or 10 percent of contract price, whichever is less. Withhold final payment until you have completed your walkthrough and received all documentation.
- Ignoring ventilation because you can’t see it. In Los Angeles, poor ventilation causes more premature failure than any single visible error. Ask for the ventilation calculation and verify it against code.
- Hiring based on lowest bid without verifying standing. Check license status at cslb.ca.gov. Confirm the contractor has a physical Los Angeles address, not a PO box or out-of-state registration.
- Skipping the post-installation inspection because “they seemed professional.” Competence and attention to detail are not the same. Even experienced crews make errors when rushed or poorly supervised.
- Delaying documentation of concerns. The 90-day window matters. Problems documented immediately carry weight. Problems raised after a season of weather exposure may be attributed to subsequent events.
- Assuming manufacturer warranty covers installation errors. It does not. Workmanship coverage comes only from your contractor. Choose one who will answer the phone in year five, not just week one.
When to Call a Professional
Some roof conditions require immediate professional assessment regardless of installation timing. Active leaks, sagging roof planes, visible structural deformation, or shingle blow-off within the first year all indicate serious problems that homeowner inspection cannot fully diagnose. If you observe any of these, or if your post-installation walkthrough reveals multiple concerns, contact a licensed roofing contractor promptly.
Ridgeline Roofing Co. offers free estimates in Los Angeles. Our background-checked, uniformed technicians document every inspection with photos from your actual roof. We provide a written assessment with no pressure and no obligation. Call (844) 563-1816 to schedule. A live person answers every call, 24 hours a day, seven days a week.
Frequently Asked Questions
Repair costs typically range from $800 for isolated flashing correction to $8,000 or more for stripping and relaying multiple improperly nailed courses. For a detailed Roofing Cost Breakdown: The Los Angeles Homeowner’s Reference for 2026, see our latest analysis. The scope depends on how many square feet are affected and whether underlying materials were damaged. Call (844) 563-1816 for a free written estimate with upfront pricing - the number we quote is the number on the invoice.
Ground-level and ladder-edge inspection is appropriate for homeowners. Walking the roof is not recommended; slopes, thermal-softened asphalt, and hidden deck damage create fall hazards. For a complete assessment, hire a licensed contractor with proper safety equipment and insurance. Our inspections include photos from your actual roof, taken by uniformed technicians who are background-checked to the standard we hold for our own families.
Inadequate ventilation paired with high-nail placement. The combination of intense attic heat and poorly secured shingles produces premature failure that looks like product defect but is entirely installation-related. We see this pattern frequently in homes from the 1960s and 1970s in neighborhoods like Woodland Hills and Granada Hills, where original ventilation was minimal and replacement crews did not upgrade it.
The critical window is before you sign completion documents. After that, California’s standard contractor warranty period is one year for workmanship, though many contractors offer longer terms. Our 90-Day Done Right Promise provides explicit, written coverage for the first three months with no paperwork or arguing if something needs correction. Document everything you observe, even after this period; photographic evidence with dates strengthens any claim.
No. Manufacturer warranties cover defects in materials, not installation errors. If shingles fail because of improper nailing, missing drip edge, or inadequate ventilation, the manufacturer will deny the claim. Your recourse is against the installing contractor’s workmanship guarantee. This is why contractor selection matters more than brand selection. We install products from seven leading manufacturers - GAF, CertainTeed, Owens Corning, IKO, Atlas, Tamko, and Boral - and we stand behind every installation with our written promise.
Document your attempts to contact them, then file a complaint with the California Contractors State License Board at cslb.ca.gov. For disputes under $12,500, small claims court is an option. Your documentation - photos, contracts, correspondence - determines your success. If you need an independent assessment for legal or insurance purposes, we provide documented inspections with detailed findings. Call (844) 563-1816 to discuss your situation.
The Bottom Line
A roof replacement is only as good as its installation. The materials matter, but the hands that place them matter more. Most premature failures are predictable, documentable, and preventable - if you know what to look for and when to look. The afternoon the crew finishes is your moment of maximum leverage. Use it. Inspect deliberately, document thoroughly, and do not sign completion until your questions are answered. Named for the ridge - the line where a roof proves itself - Ridgeline Roofing Co. has built our reputation on doing the job right the first time, and making it right if we don’t. That’s the square deal. That’s why we’re still here, serving Los Angeles homeowners, four decades after we started.
Written by the team at Ridgeline Roofing Co., serving Los Angeles since 2016.